Zigbang Smart Home App
App Installation
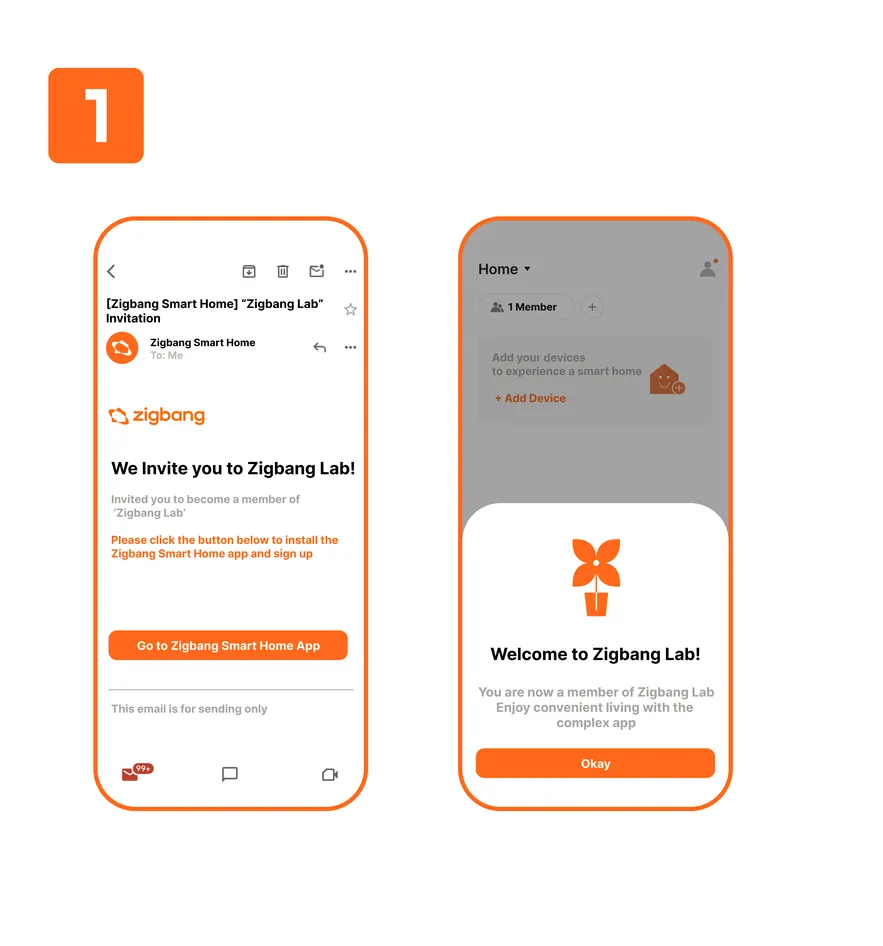
- When a resident’s information is registered in the complex management system, an invitation email is sent to the registered resident’s email address.
- If the resident has already installed the app, the invitation message can also be viewed within the app.
- After checking the invitation email on a smartphone, tap the button at the bottom to install the app.
- The app can also be installed by searching the store directly:
- iOS : Search for “Zigbang Smart Home” in the App Store.
- Android : Search for “Zigbang Smart Home” in the Play Store.
- The app can also be installed by searching the store directly:
Registration
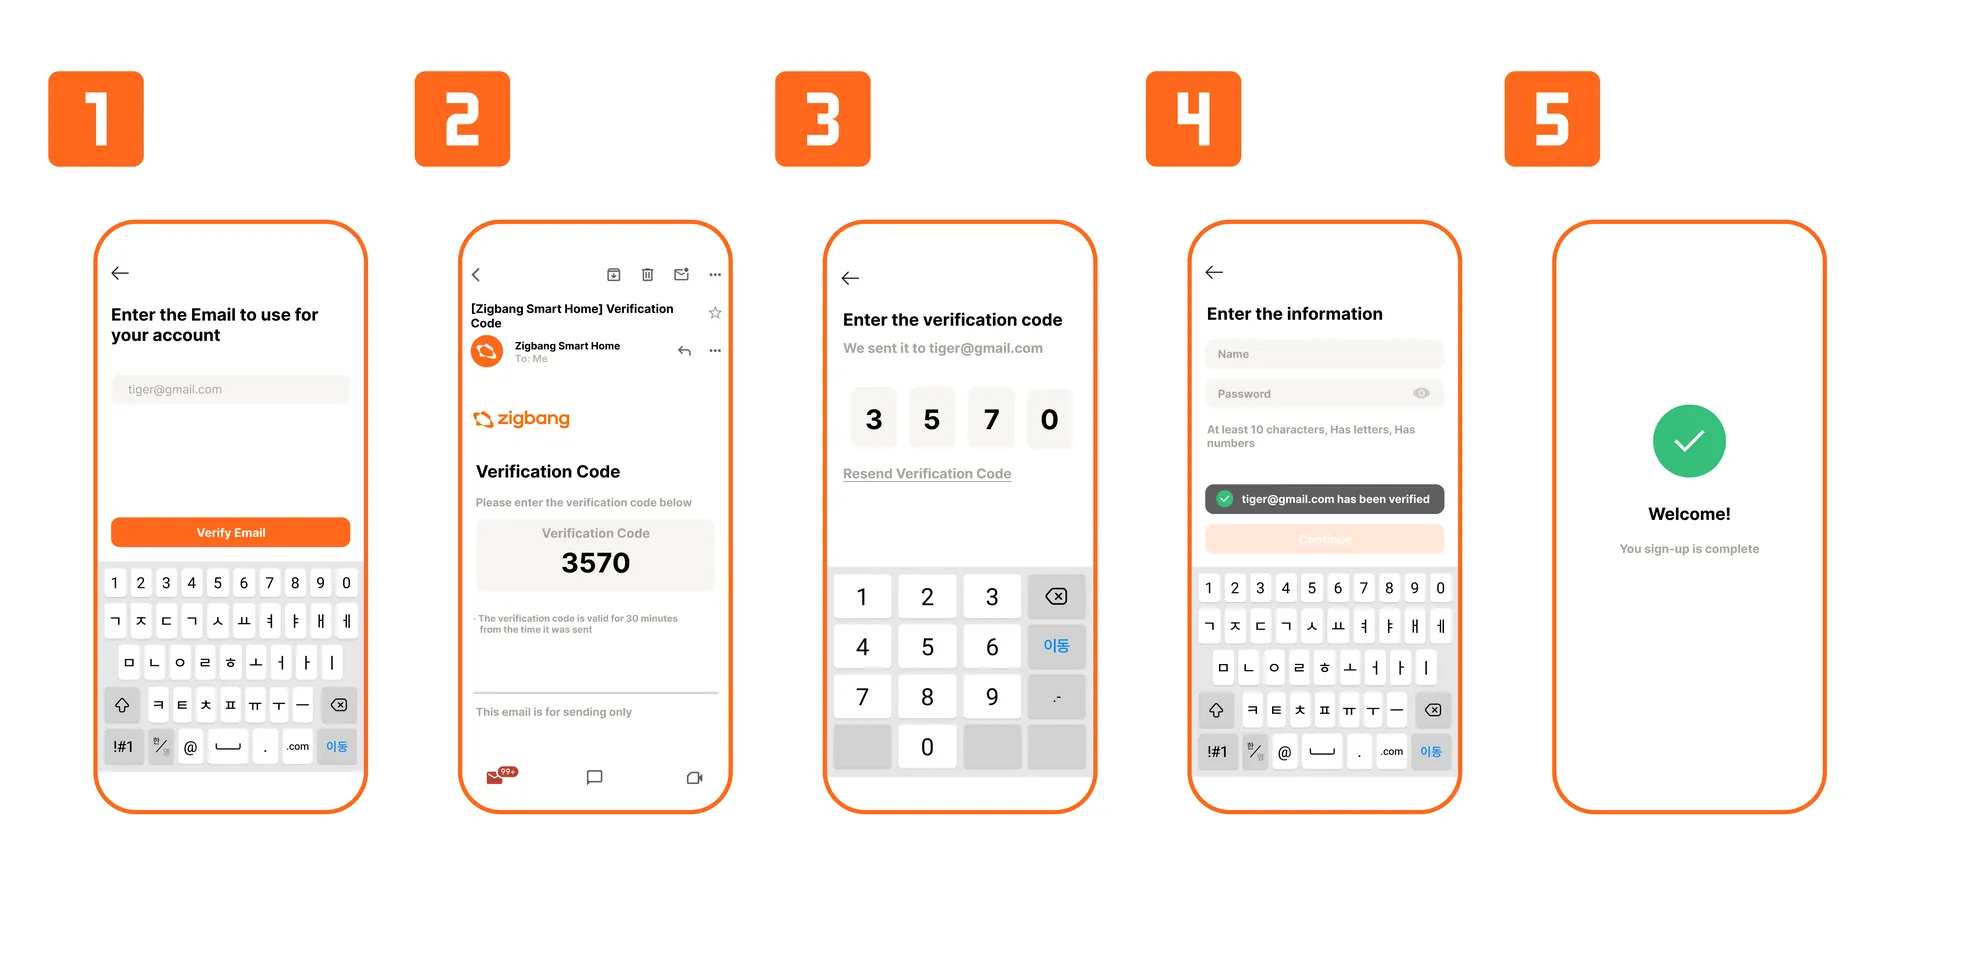
- After launching the app, tap the "Sign Up" button.
- Enter the email address you wish to use for your account, then tap the "Verify Email" button.
- You must sign up using the email address where you received the invitation email.
- Go to your email inbox and check for the verification code.
- If you don’t see the email, please check your spam or junk folder.
- Enter the 4-digit verification code in the app.
- Enter your name and password to use in the app.
- After agreeing to the Terms of Service and allowing notifications, the sign-up process is complete.
Access Key Registration Guide
Facial Recognition
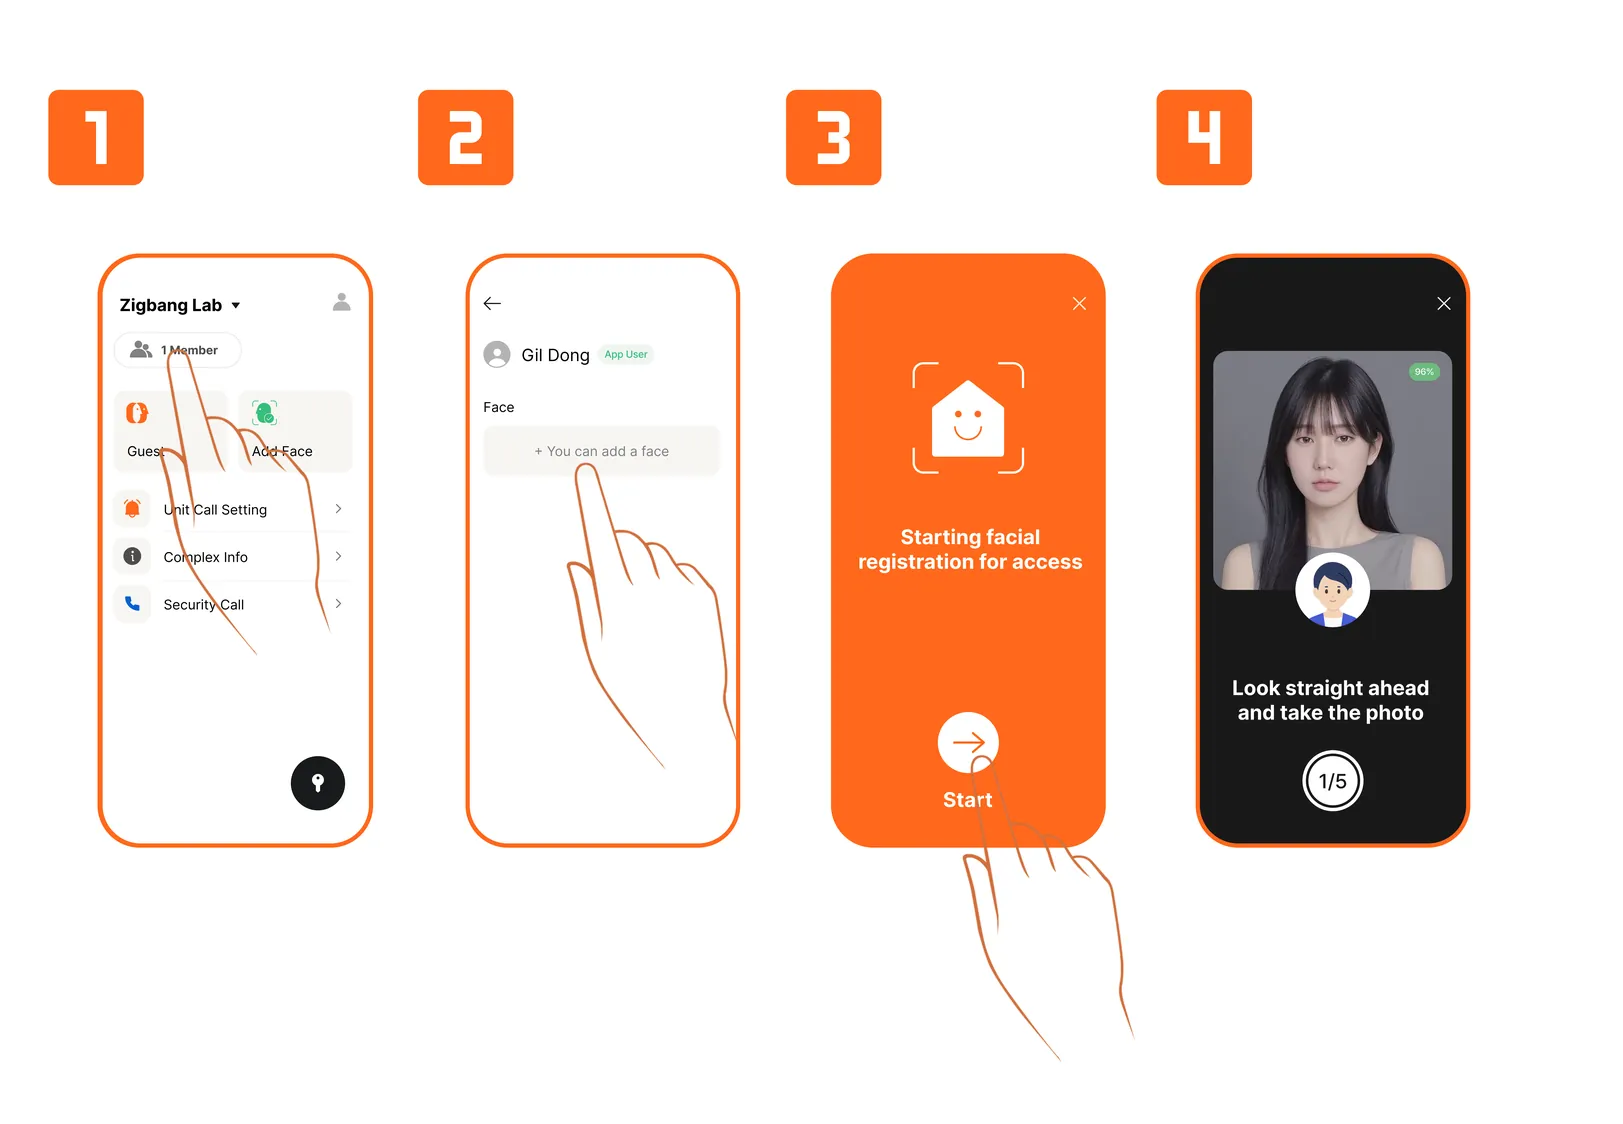
- In the app, tap the Members button, then select the member whose facial information you want to register.
- Alternatively, tap the ‘Add Face' button to start the face registration process.
- Tap the ‘You can add Face’ button to enter face registration mode.
- Follow the on-screen instructions to take a photo and complete the facial registration.
*Facial information can also be registered by visiting the management office.
Mobile Key
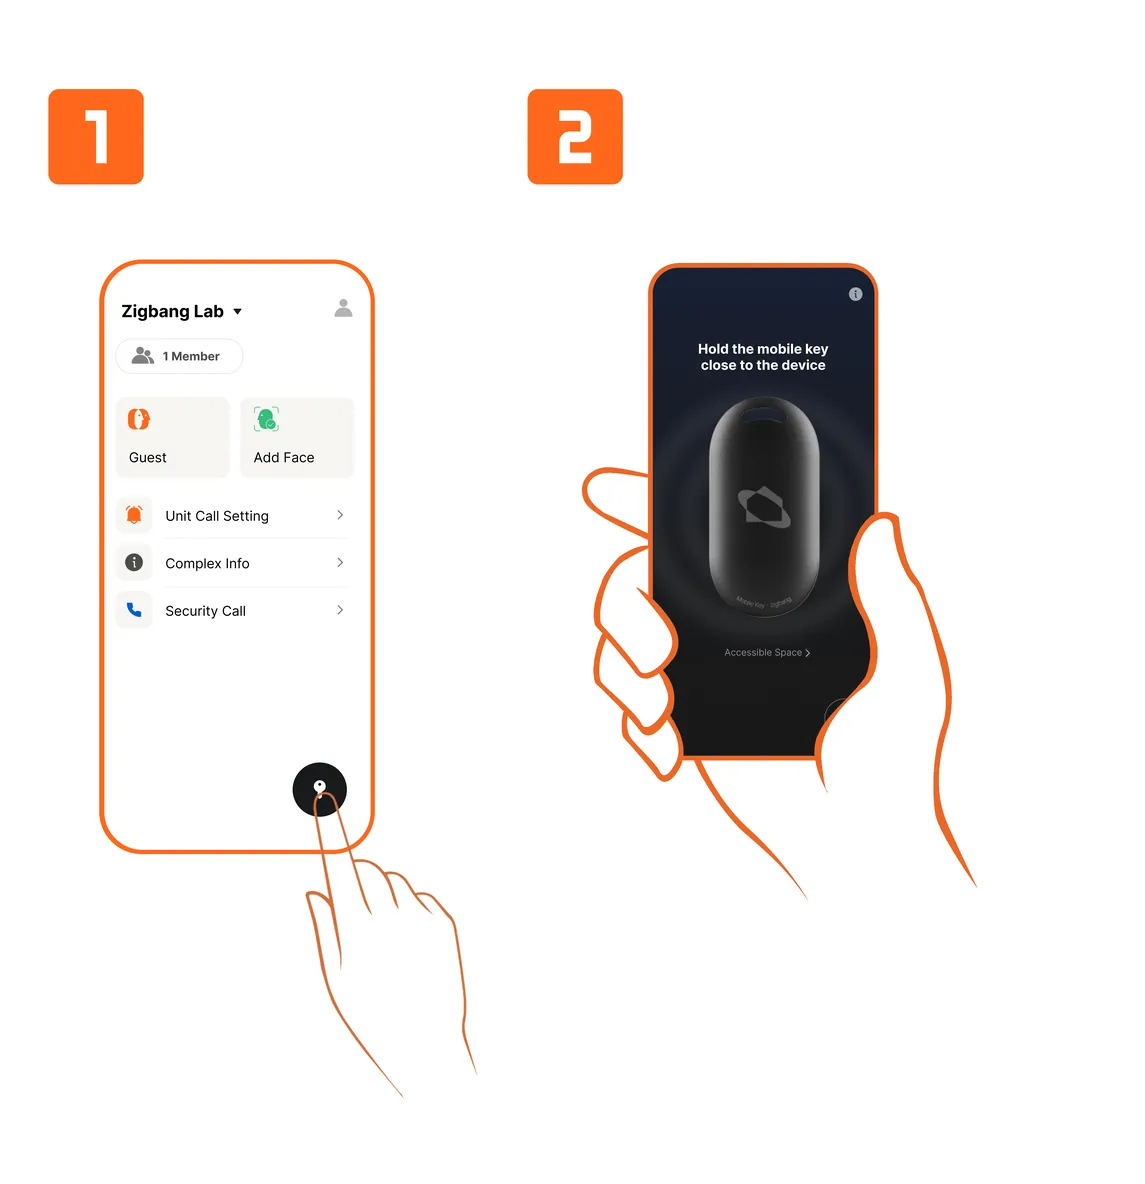
- Once the app registration and resident information are verified, the user’s Mobile Key will be automatically generated in the app.
- In the app, tap the button at the bottom right to activate the Mobile Key.
*To use the Mobile Key, the Bluetooth option on your smartphone must be turned on.
RF Card
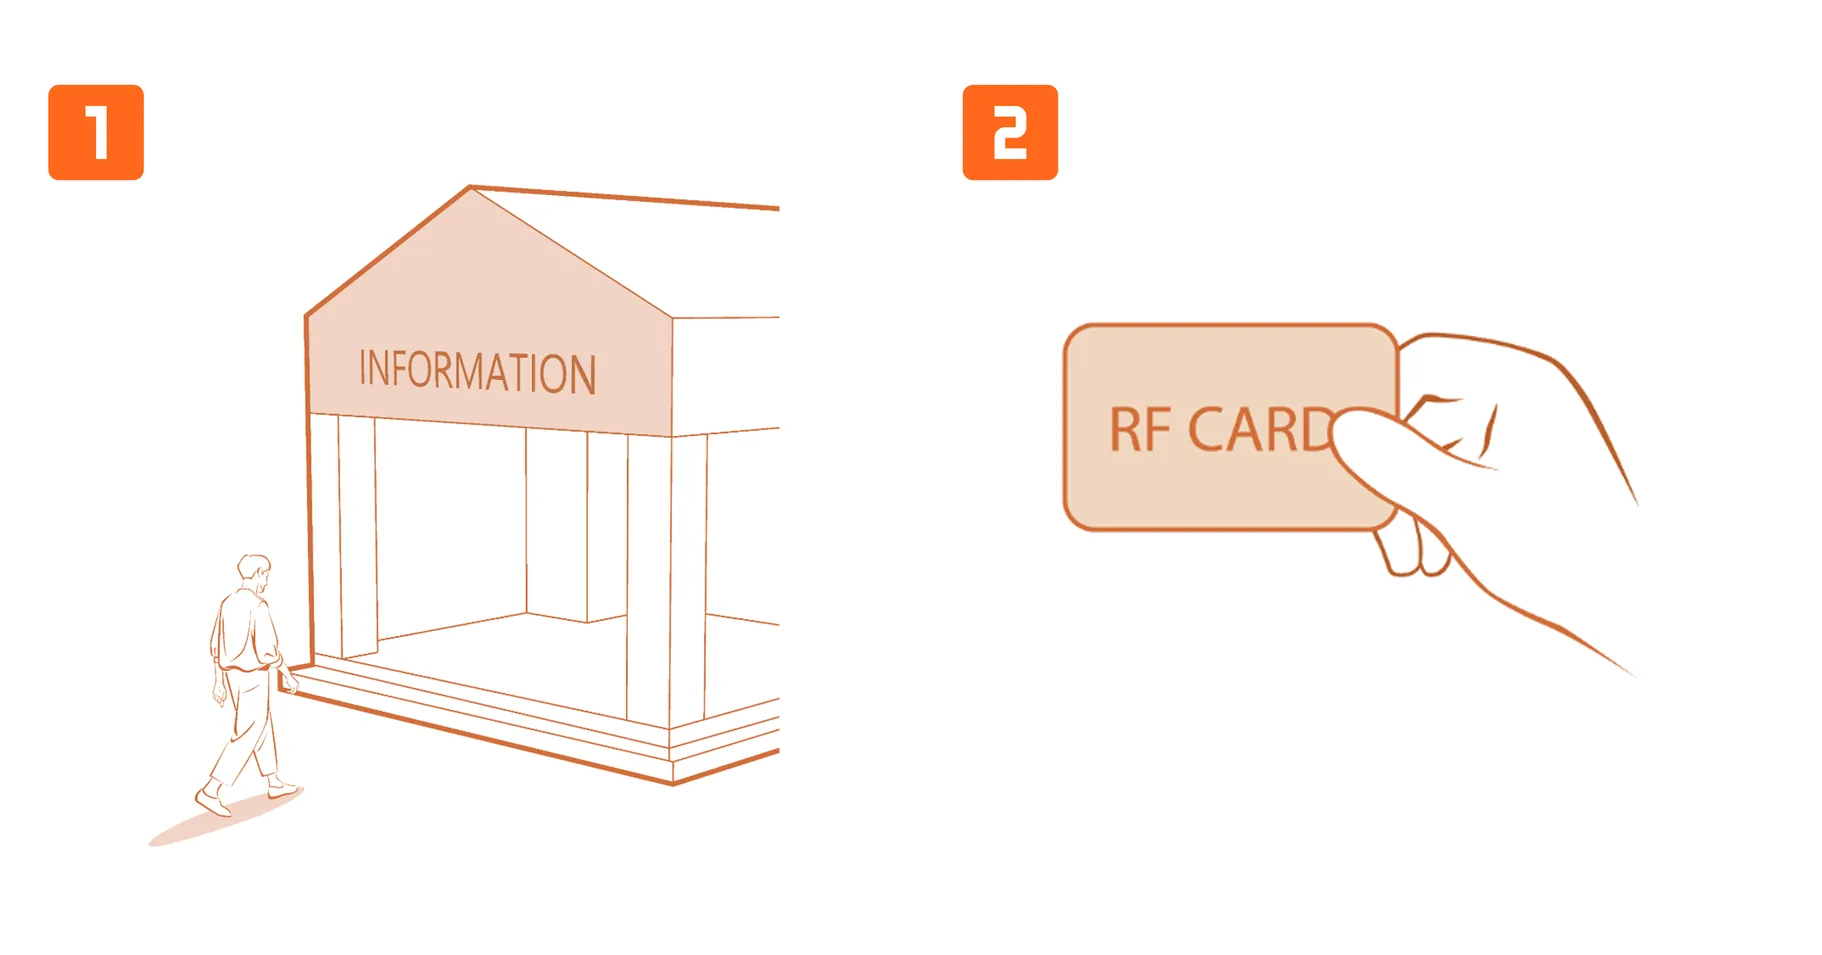
- The RF Card can be obtained by visiting the management office.
Access Authentication
Facial Recognition Access
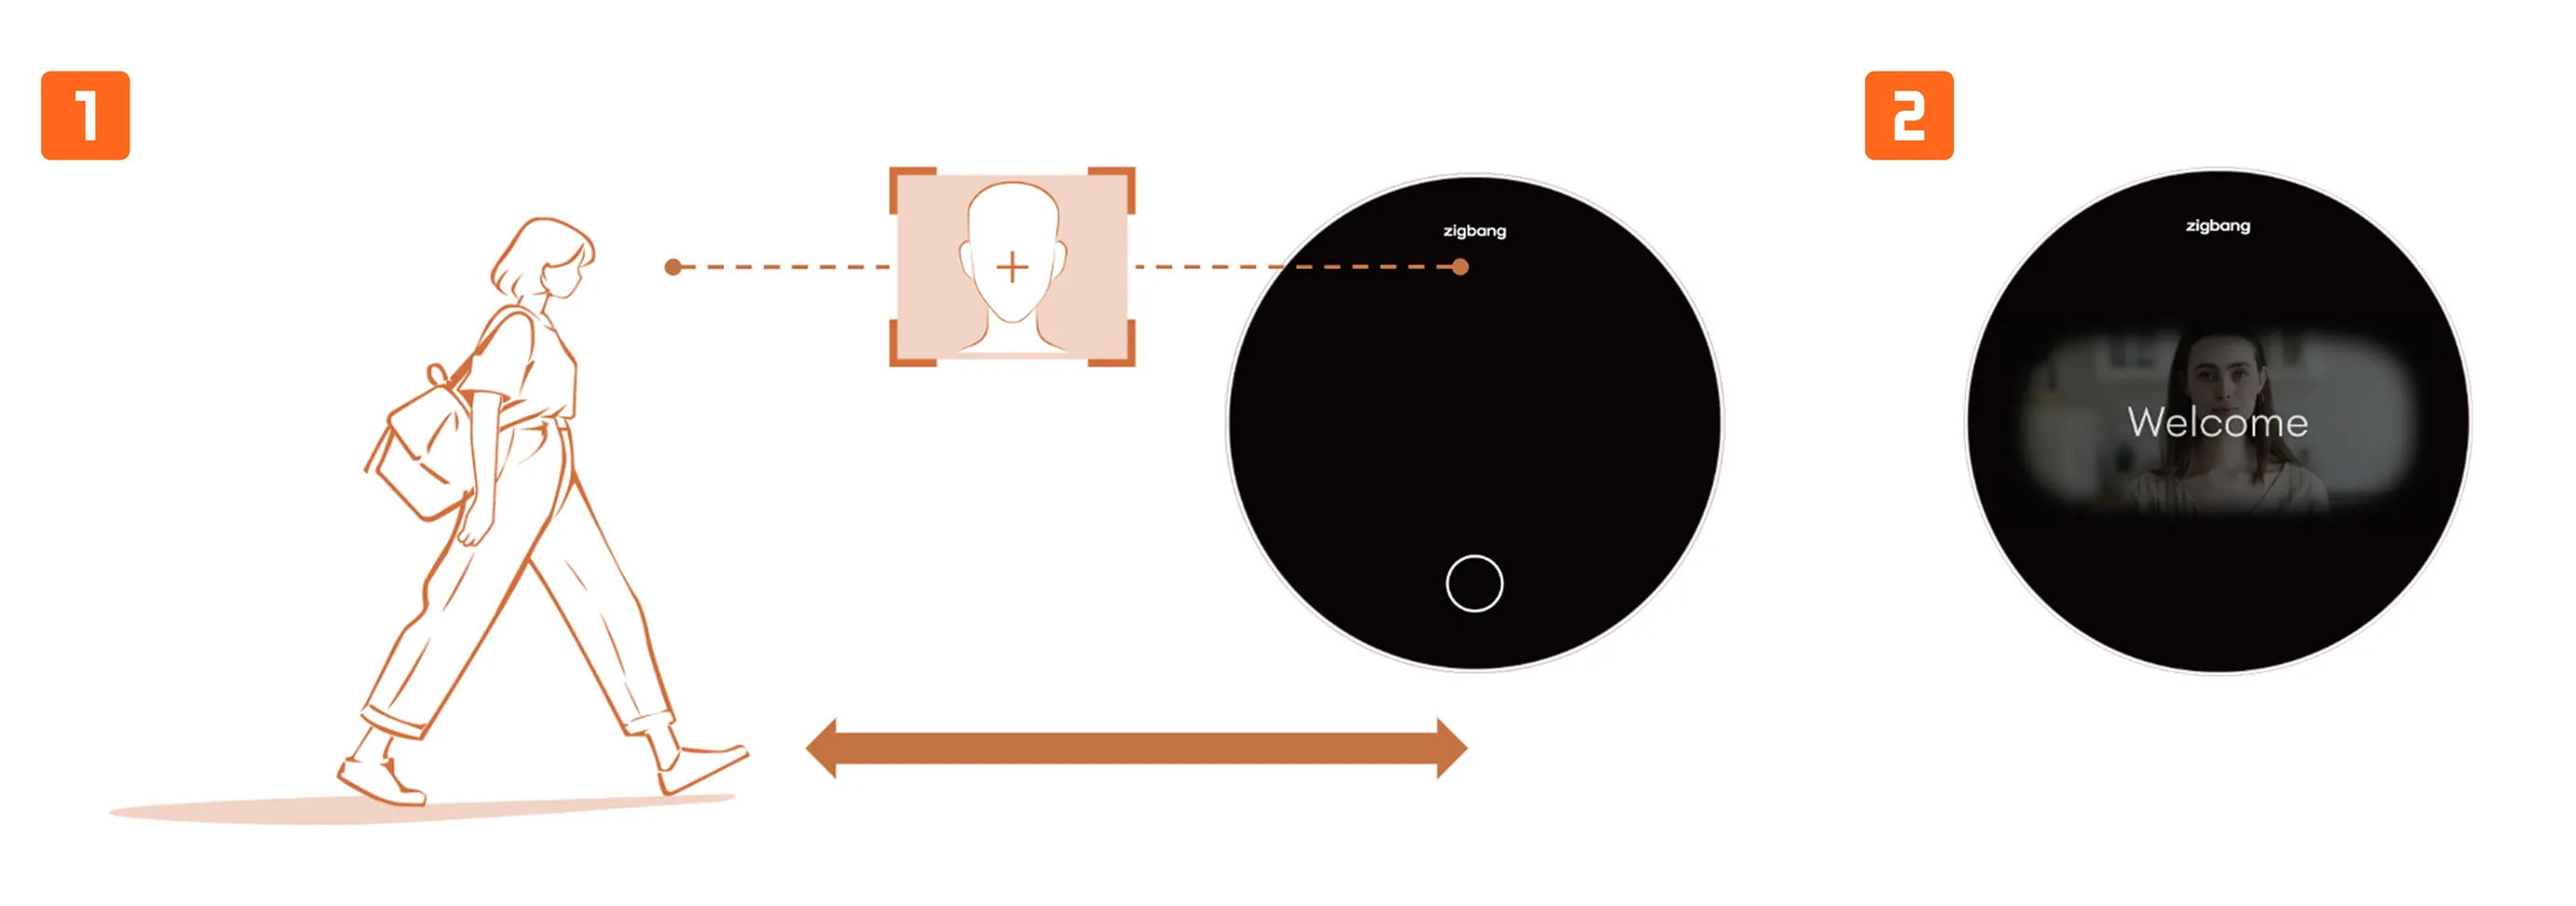
Face recognition begins automatically from approximately 1 meter in front of the device using Auto Face Detection & Walk-Through technology.
When the resident’s information is verified, the automatic door will open.
*The resident’s facial information must be registered in advance. *The device will continue attempting face recognition until it enters voice call mode. *Please remove your mask, sunglasses, and hat for accurate facial recognition.
Mobile Key Access
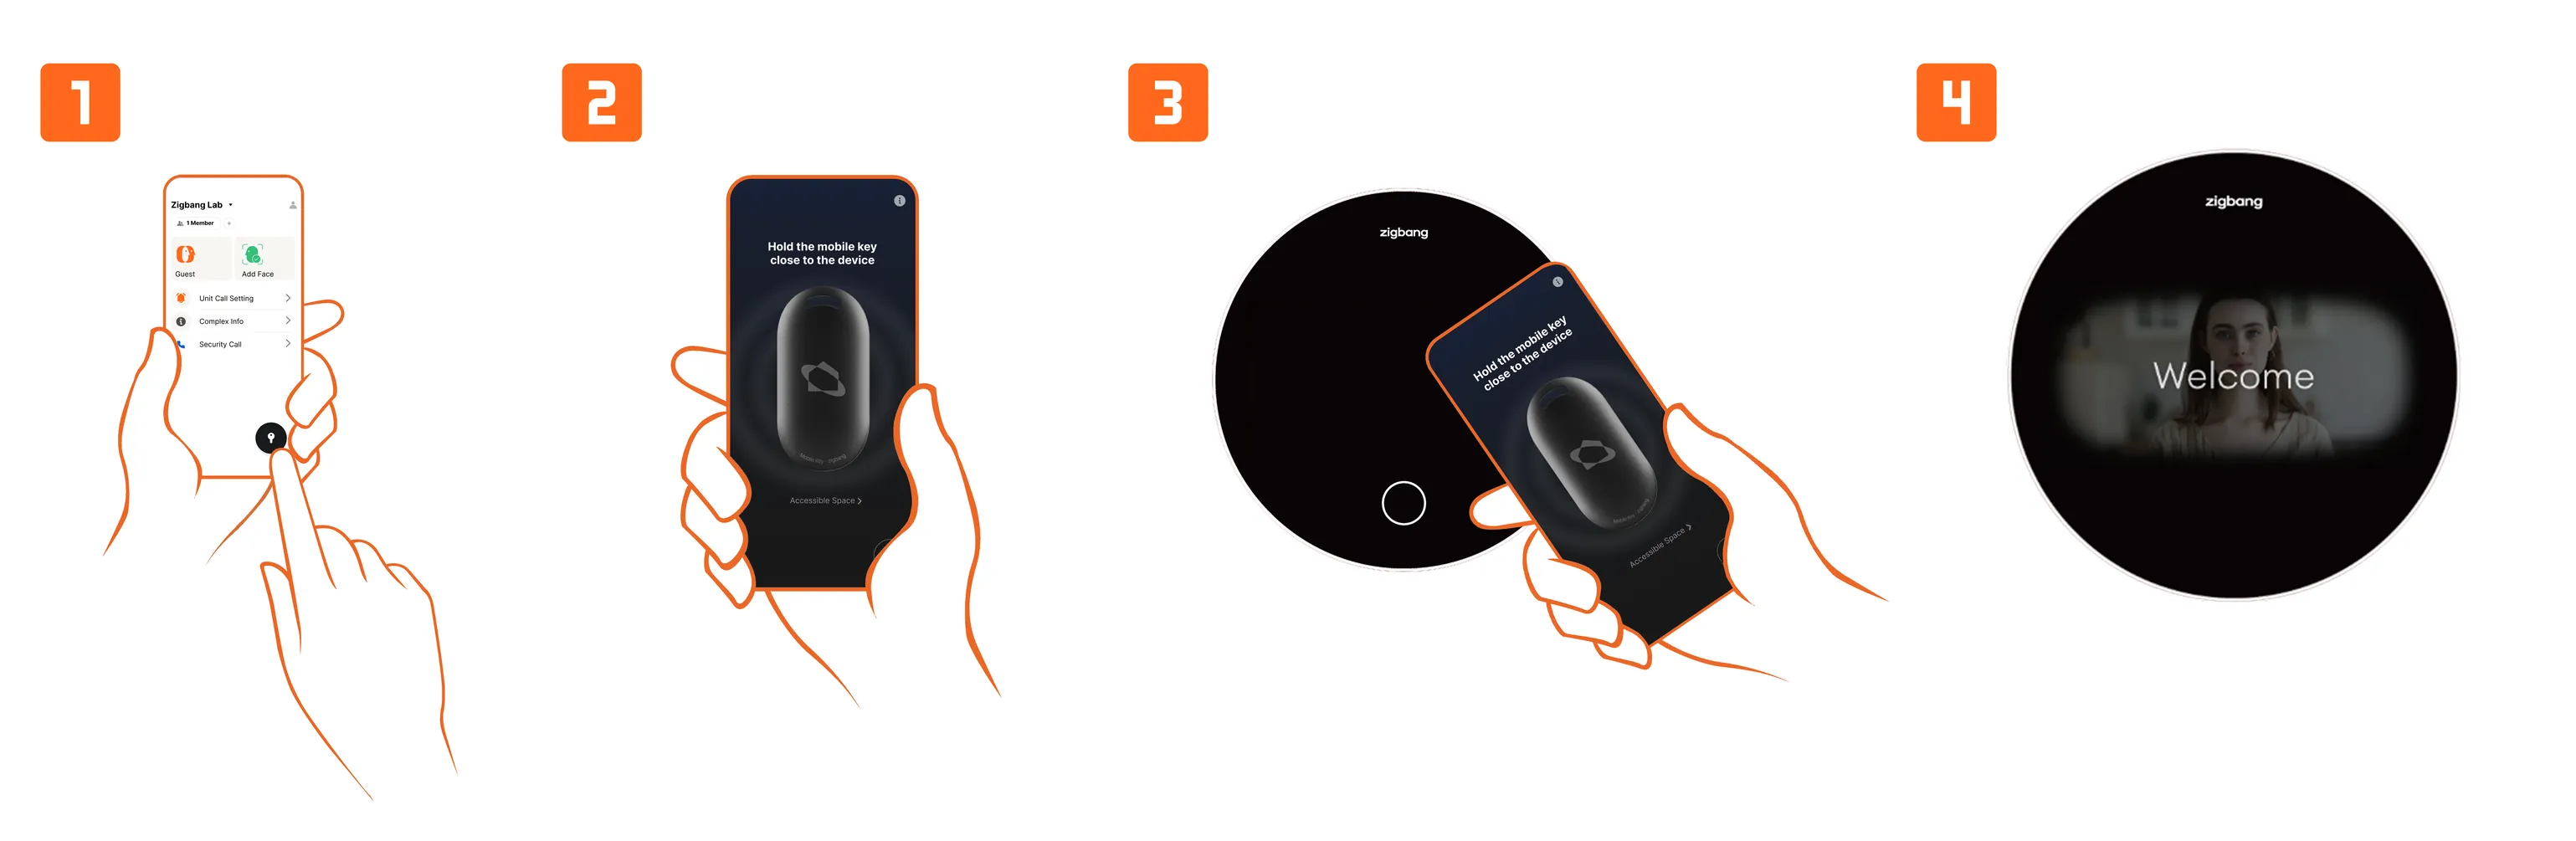
In the app, tap the button at the bottom right to activate the Mobile Key.
With the Mobile Key activated, bring your smartphone close to the device.
When the resident’s information is verified, the automatic door will open.
*App registration and resident verification must be completed in advance. *To use the Mobile Key, the Bluetooth option on your smartphone must be turned on.
RF Card Access
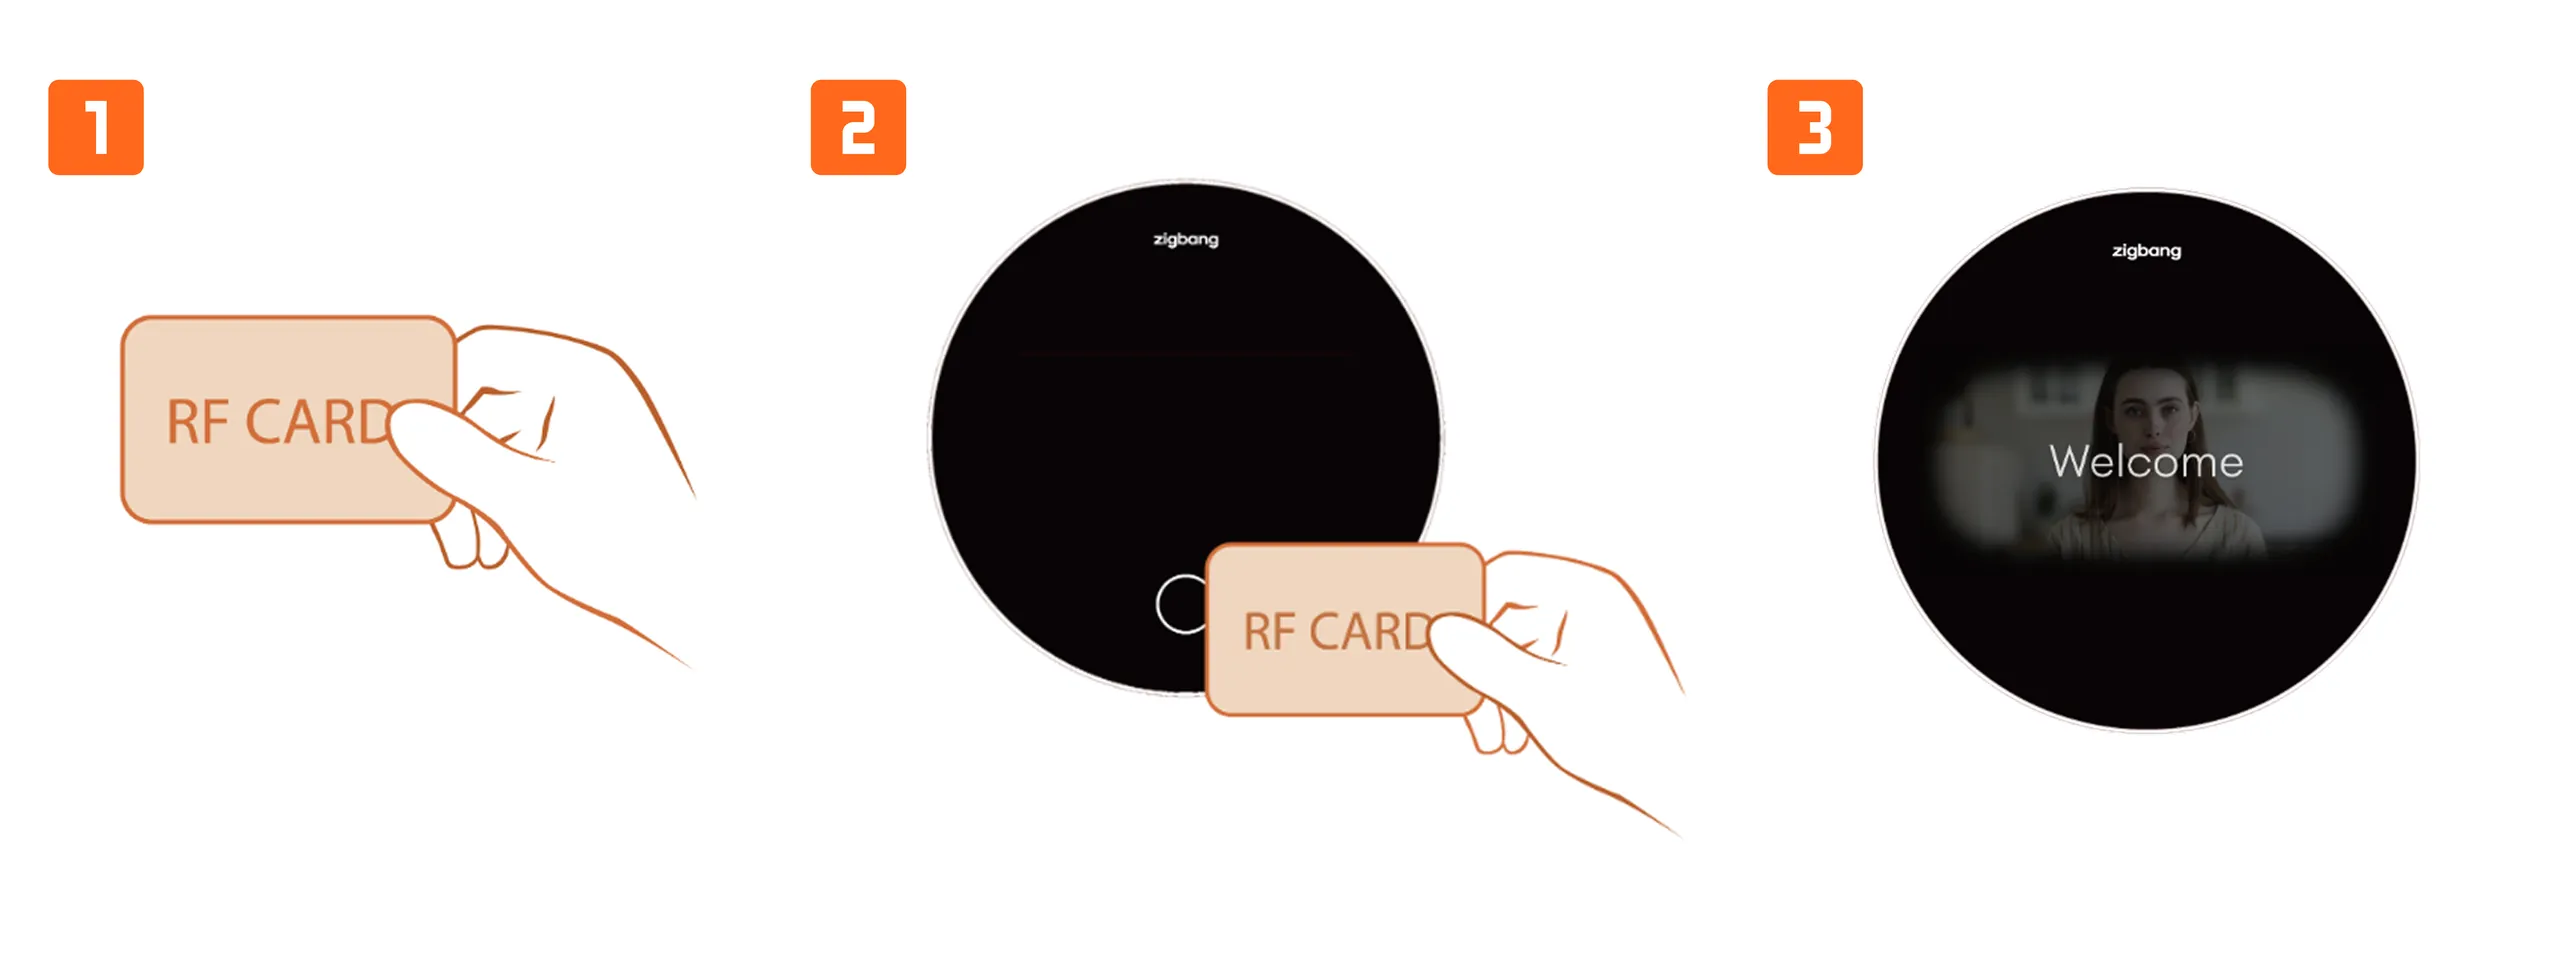
Tap the registered RF Card on the Home button.
When the resident’s information is verified, the automatic door will open.
*RF Cards can be obtained at the management office after resident verification.
Create Guest passcode
Create basic passcode
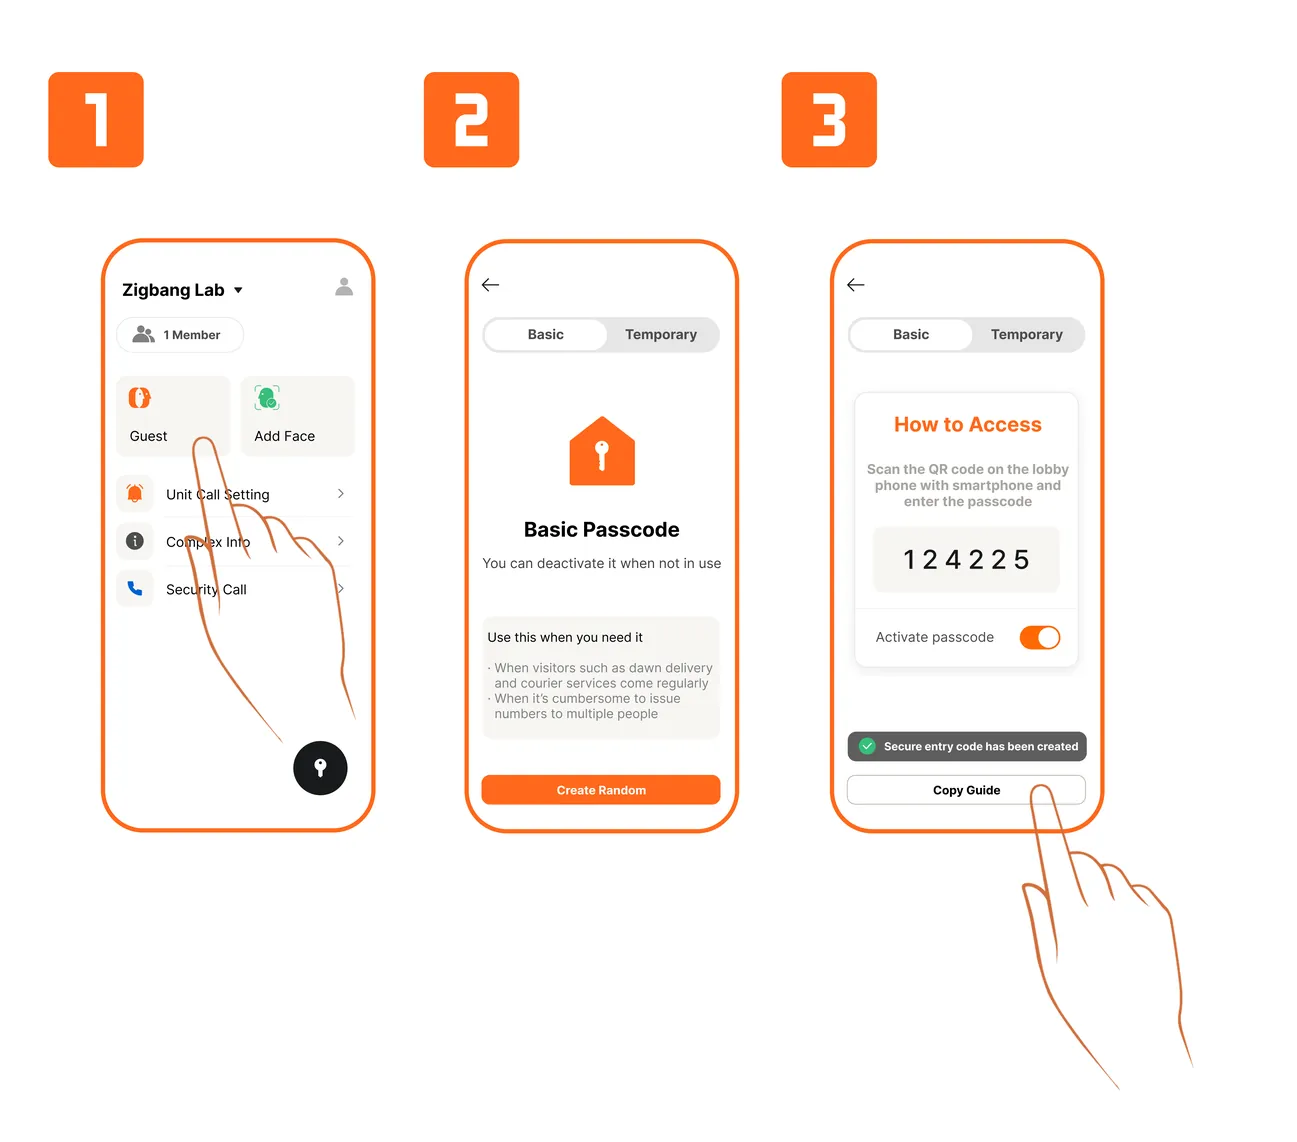
Residents can provide visitors with a basic passcode via the app.
- The basic passcode can be enabled or disabled.
- When enabled, the visitor can use the code to enter through the main entrance.
- When disabled, the code cannot be used for entry.
- The basic passcode can be enabled or disabled.
Tapping the “Create Random" button will create a random passcode.
Once the code is generated, tap the "Copy Guide" button to share the passcode and entry instructions with the visitor.
*For the basic passcode, only one password can be issued *App registration and resident verification must be completed beforehand.
Create temporary passcode
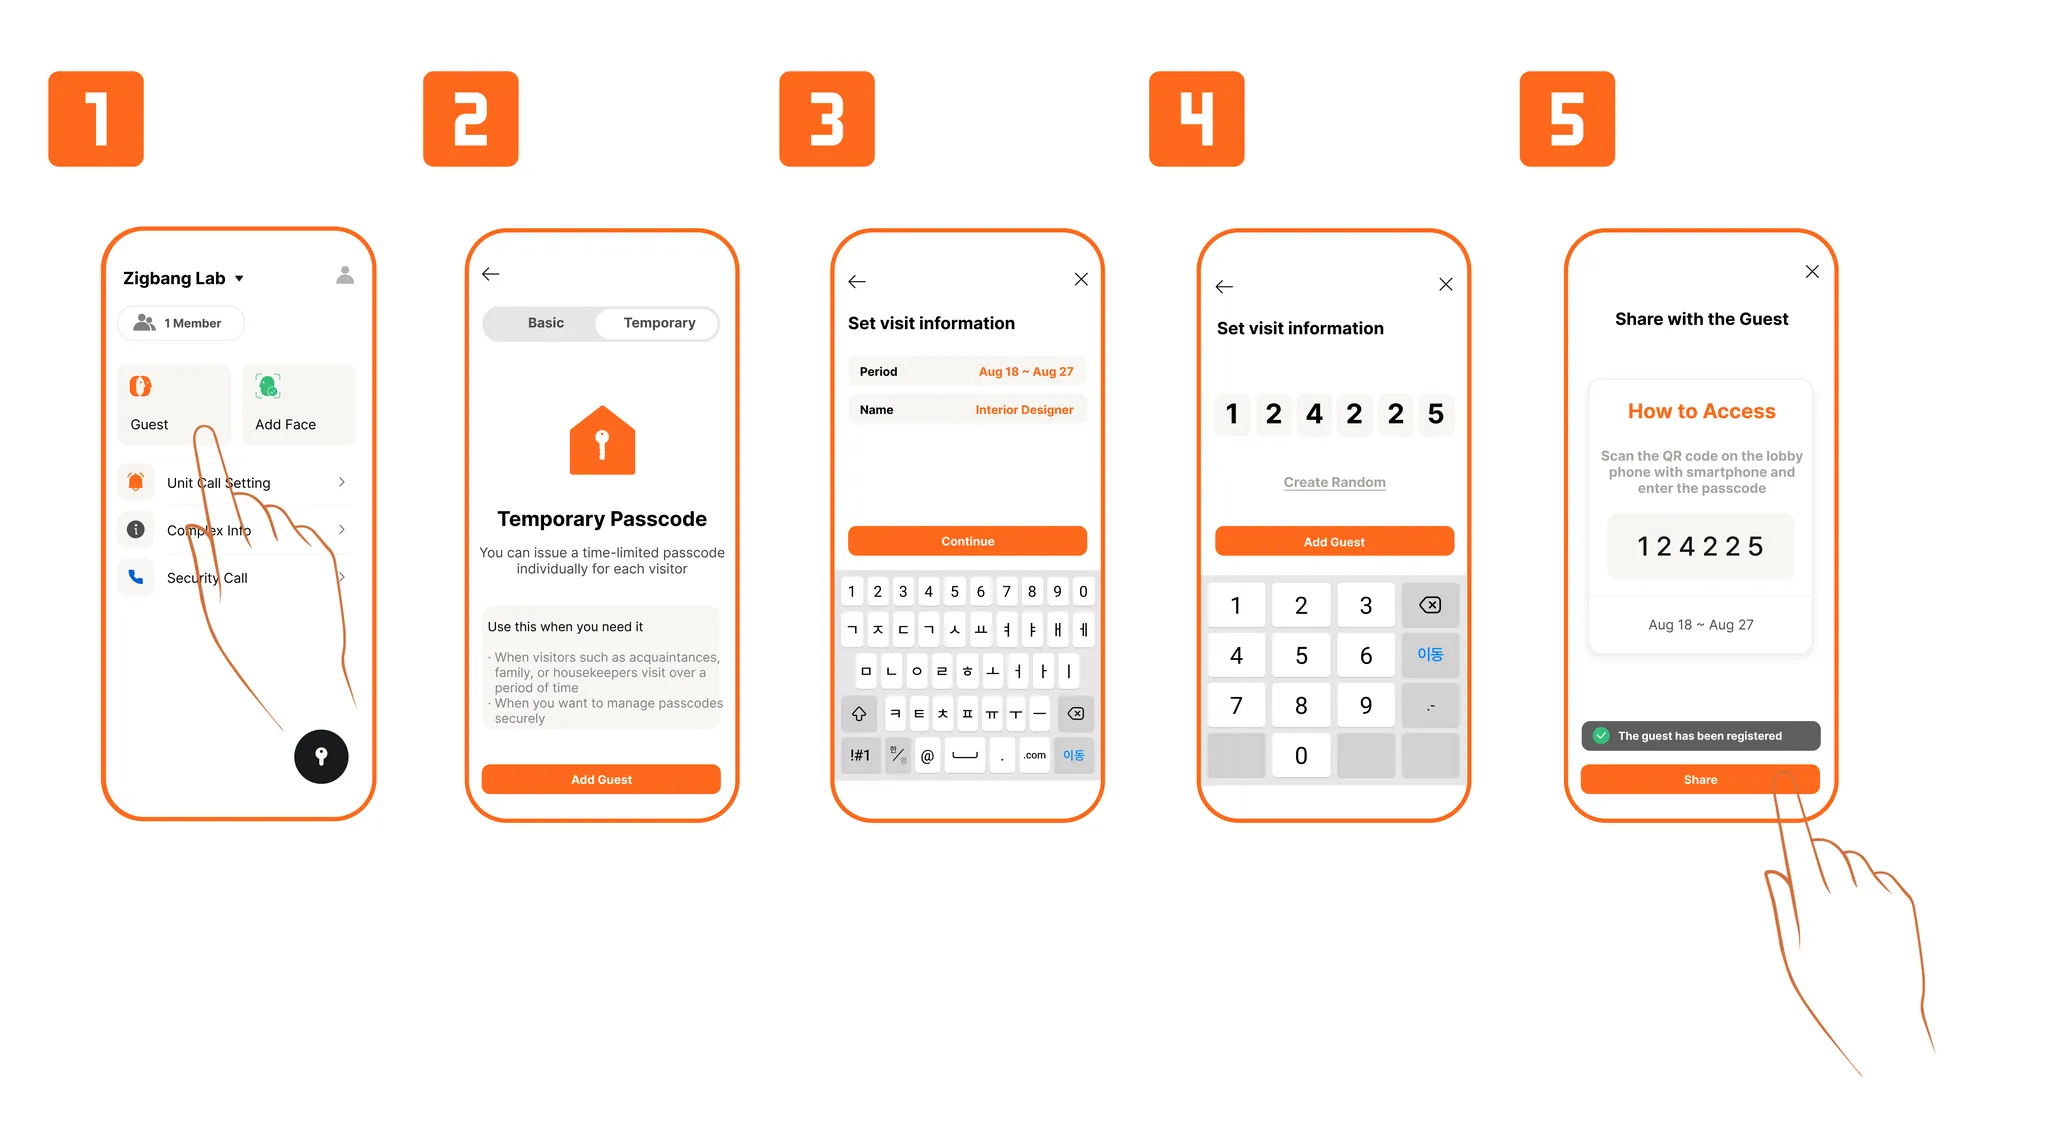
Residents can provide visitors with a temporary passcode via the app.
- A validity period can be set for the temporary passcode.
- The code will only allow entry through the main entrance during the specified period.
- After the period expires, the code will no longer be valid.
- A validity period can be set for the temporary passcode.
Tap the "Add Guest" button to set the access period and generate a temporary passcode.
Once the code is generated, tap the "Share" button to send the temporary passcode to the visitor.
*Temporary passcode can be issued with multiple passwords for different user types.
*App registration and resident verification must be completed beforehand.
Visitor Video Call
Unit Call Setting
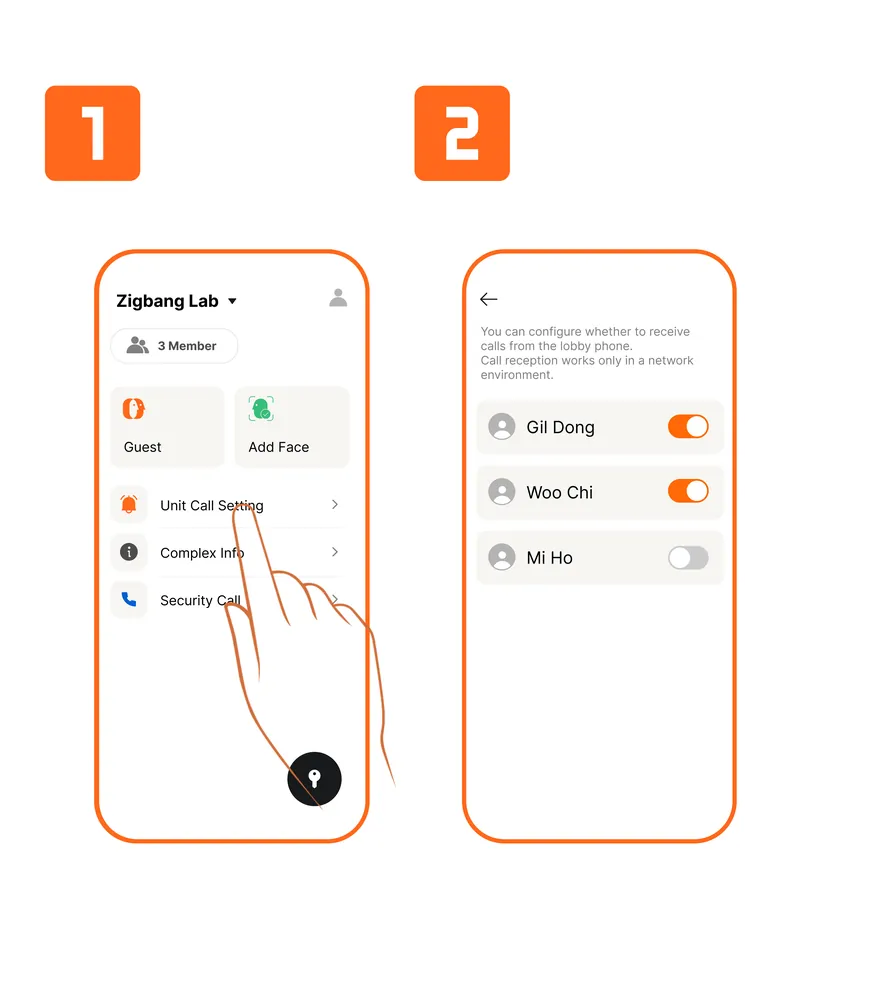
- You can configure whether each household member receives call notifications when a visitor calls your unit from the common entrance.
- If this setting is deactivated for a specific member, they will not receive call notifications even if a call is made from the common entrance.
- At least one household member must have their call notification setting activated.
*Please ensure that notification settings for this app are enabled in your smartphone's system settings.
Visitor Video Call & Door Unlock
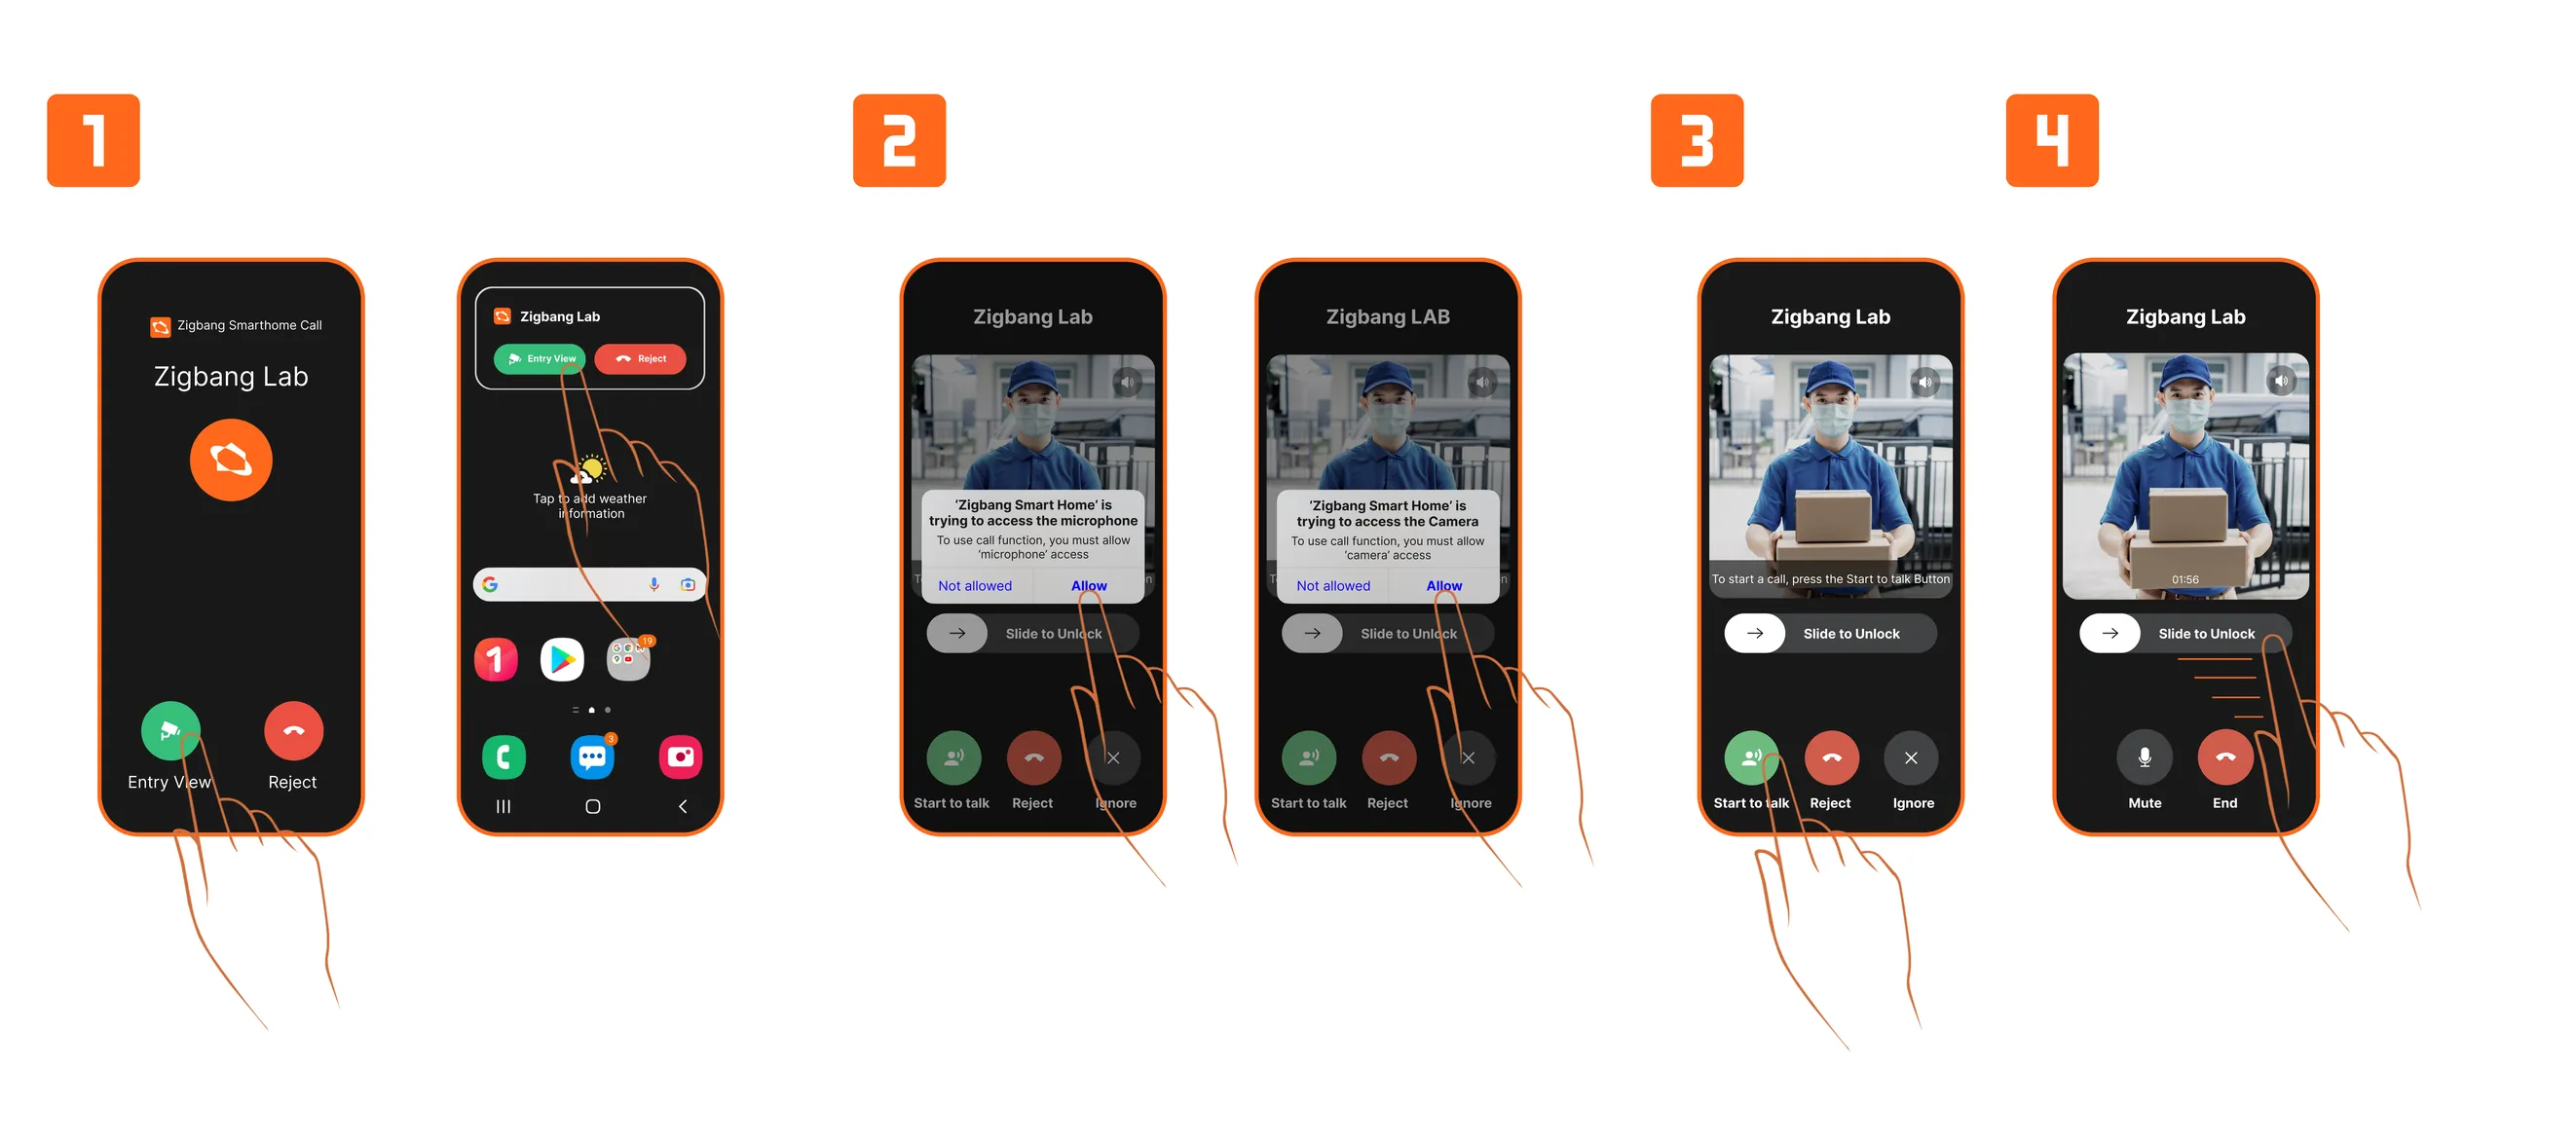
When a visitor calls your unit from the main entrance, a call notification will be sent to the resident’s smartphone.
Tapping "Entry View" will bring up the video call interface.
- If you tap "Reject", the call from the main entrance will be terminated.
On the video call screen, you can start a call with the visitor by tapping the "Talk" button.
- Tapping "Reject" will end the call from the main entrance. (= Call Ended)
- Tapping "Ignore" means you do not answer the call, but the visitor will still see the screen as “connecting.” (= Missed Call / No Answer)
- Tapping "Mute" will turn off your microphone while keeping the video active.
From any screen, you can unlock the main entrance door by dragging the "Slide to Unlock" button to the right.
*If a popup asks for microphone and camera access, please tap “Allow.”